
If you have Seen Window7, Then you know About the AeroSnap.
This is where you can Snap the Explorer and/or IE window to one side or the other to make it Tile, Or from top to bottom.
Now you can have the same thing on windows Vista or XP.
Free
What is AeroSnap?
AeroSnap is a simple but powerful application that allows you to resize, arrange or maximize your desktop windows with just drag'n'drop.
Simple drag a window to a side of your desktop to snap it or drag it to the top to maximize.
It also works with multiple monitors!
Click HERE to get it today.
Friday, April 30, 2010
Thursday, April 29, 2010
How to set Default Programs in Visa and Windows 7
1) Click on start
2) On the right you should See Default Programs, If not you can Find it under Control Panel.
3) Click on what you want to set Default for Programs and how your CD/DVD's work.
To see more Videos or this one Click HERE
Wednesday, April 28, 2010
Microsoft Security Essentials 1.0
Microsoft Security Essentials 1.0 Part One: A detailed look at UI.
For years Microsoft has been releasing different iterations of their Windows OS and people have been using it pleasantly. But none of the OS till the date, even Windows 7 latest in Windows Family, don’t have any anti-virus solution built directly inside them. Though Microsoft made Windows Defender, which comes integrated in Windows Vista and Windows 7 and freely available for Windows XP was a merely a anti-spyware solution that was not strong too. So users had to rely on 3rd party anti-virus solutions for years. It seems Microsoft has finally heard the critics and users feedbacks. Now they have come with their own anti-virus solution for Windows, christened as Microsoft Security Essentials. Yeah, there was another solution was available for Windows known as Windows Live OneCare from Microsoft, but it was subscription based service and users would have to buy it. This was disappointing given the fact users had already paid enough for Windows license and it’s MSs responsibility to provide users with anti-virus solution for their OS since Windows Operating Systems are favorite among hackers too. But MS-SE (Microsoft Security Essentials) is totally free for Windows users given that they are running genuine copies of Windows OS. That doesn’t mean user of pirated copies can buy it.

The home screen of MS-SE isn’t much to talk about. It’s very simple but not exciting and intuitive as I was expecting it to be. On top of this screen, you can see computer status. It turns red if your computer has un-attended infected item or update is not latest, otherwise it’ll be green. Just below that you’ll find status of real time protection and virus definition. On right side you can get three scan options Quick, Full and Custom. If you’re expecting ‘Custom’ scan to be really custom scan then you’ll be disappointed. ‘Custom’ scan doesn’t have any option to select ‘Scan Intensity’ or any other special ‘action’ for RAR files. It just have list of locations to scan as you can see in screenshot below. And on the bottom you’ll see scan details like schedule of scan and when last scan was performed.


MS-SE History click to see Image
The History tab in MS-SE is same as ‘Quarantine Items’ page found in other anti-virus solutions. As usual you can see list of detected infected items/files. Here you get three views for your convenience. You can choose to see all detected items, quarantined and allowed, in one list or you can see them in individual lists. Allowed items are those which are detected as malware or PUPS (potentially unwanted programs). Sometimes anti-virus detects harmless items as malware. So if user trusts those items and allows them to stay on computer then such items will be displayed in detected items list.
In my honest opinion, in any anti-virus ‘Settings’ page is the most interesting thing rather it must be. But as with rest of the UI even this part of the MS-SE continues to disappoint.
MS-SE Settings click to see image
Under ‘Settings’ tab you’ll find another eight pages starting with schedule page. Schedule page as the name suggests you’ll get option to schedule computer scan. You can enable or disable schedule scan. Other options are date, time, type of scan like quick scan, when it should run on your computer like when your computer is idle.
MS-SE Settings – Default Actions click to see Image
Next page is ‘Default Actions’ page. Here you get to choose action for detected items at different intensity levels. You get four actions to choose from for all levels except for ‘Severe’ and ‘High’ level alert where you don’t get ‘Allow’ option.
MS-SE Real Time Protection Click to see Image
‘Real Time Protection’ page has very little to offer. An option to turn on or off Real time protection, whether or not MS-SE monitor file and programs on your PC, and option to keep eye on file downloads.
MS-SE Exclusions Lists
Next three pages under ‘Settings’ tab are almost similar except that they are used to exclude different kind of items. First is to exclude specific files and locations, second is to exclude specific file types and third is to exclude specific processes.
MS-SE Settings – Advanced
‘Advanced’ page, but even there I didn’t find ant ‘wow’ thing. I was expecting some really advanced settings here but was disappointed again. It has option to include compressed files in scan. USB drives and other removable media to be included in full scan, option to create restore point. The last option when unchecked, limits the view of history page for non-admin accounts on system.
MS-SE Settings-Microsoft SpyNet
On this page you get two options, Basic membership and Advanced membership. When I first saw these options I thought Microsoft has paid version too. But when I read the description it turned out to be something different and unexpected. Even at early stage this anti-virus system has facility to send suspected files to Microsoft automatically. This was something which I had seen in some other mature anti-virus systems like ESET NOD32. Beware this can sometimes send personal information to MS, mostly unintentionally (that’s what MS says, unintentionally!). There’s no way you can disable this.
To Download This Free program Click HERE
http://www.microsoft.com/security_essentials/
For years Microsoft has been releasing different iterations of their Windows OS and people have been using it pleasantly. But none of the OS till the date, even Windows 7 latest in Windows Family, don’t have any anti-virus solution built directly inside them. Though Microsoft made Windows Defender, which comes integrated in Windows Vista and Windows 7 and freely available for Windows XP was a merely a anti-spyware solution that was not strong too. So users had to rely on 3rd party anti-virus solutions for years. It seems Microsoft has finally heard the critics and users feedbacks. Now they have come with their own anti-virus solution for Windows, christened as Microsoft Security Essentials. Yeah, there was another solution was available for Windows known as Windows Live OneCare from Microsoft, but it was subscription based service and users would have to buy it. This was disappointing given the fact users had already paid enough for Windows license and it’s MSs responsibility to provide users with anti-virus solution for their OS since Windows Operating Systems are favorite among hackers too. But MS-SE (Microsoft Security Essentials) is totally free for Windows users given that they are running genuine copies of Windows OS. That doesn’t mean user of pirated copies can buy it.

(Click to Enlarge)
The home screen of MS-SE isn’t much to talk about. It’s very simple but not exciting and intuitive as I was expecting it to be. On top of this screen, you can see computer status. It turns red if your computer has un-attended infected item or update is not latest, otherwise it’ll be green. Just below that you’ll find status of real time protection and virus definition. On right side you can get three scan options Quick, Full and Custom. If you’re expecting ‘Custom’ scan to be really custom scan then you’ll be disappointed. ‘Custom’ scan doesn’t have any option to select ‘Scan Intensity’ or any other special ‘action’ for RAR files. It just have list of locations to scan as you can see in screenshot below. And on the bottom you’ll see scan details like schedule of scan and when last scan was performed.

Next tab in the UI is ‘Update’ tab.

As in every antivirus solution you will definition download date and time, definition version of both virus and spyware definition. Later is not usually seen in others softwares. And one usual thing you’ll get is button to update definitions. So here ends this second tab.
MS-SE History click to see Image
The History tab in MS-SE is same as ‘Quarantine Items’ page found in other anti-virus solutions. As usual you can see list of detected infected items/files. Here you get three views for your convenience. You can choose to see all detected items, quarantined and allowed, in one list or you can see them in individual lists. Allowed items are those which are detected as malware or PUPS (potentially unwanted programs). Sometimes anti-virus detects harmless items as malware. So if user trusts those items and allows them to stay on computer then such items will be displayed in detected items list.
In my honest opinion, in any anti-virus ‘Settings’ page is the most interesting thing rather it must be. But as with rest of the UI even this part of the MS-SE continues to disappoint.
MS-SE Settings click to see image
Under ‘Settings’ tab you’ll find another eight pages starting with schedule page. Schedule page as the name suggests you’ll get option to schedule computer scan. You can enable or disable schedule scan. Other options are date, time, type of scan like quick scan, when it should run on your computer like when your computer is idle.
MS-SE Settings – Default Actions click to see Image
Next page is ‘Default Actions’ page. Here you get to choose action for detected items at different intensity levels. You get four actions to choose from for all levels except for ‘Severe’ and ‘High’ level alert where you don’t get ‘Allow’ option.
MS-SE Real Time Protection Click to see Image
‘Real Time Protection’ page has very little to offer. An option to turn on or off Real time protection, whether or not MS-SE monitor file and programs on your PC, and option to keep eye on file downloads.
MS-SE Exclusions Lists
Next three pages under ‘Settings’ tab are almost similar except that they are used to exclude different kind of items. First is to exclude specific files and locations, second is to exclude specific file types and third is to exclude specific processes.
MS-SE Settings – Advanced
‘Advanced’ page, but even there I didn’t find ant ‘wow’ thing. I was expecting some really advanced settings here but was disappointed again. It has option to include compressed files in scan. USB drives and other removable media to be included in full scan, option to create restore point. The last option when unchecked, limits the view of history page for non-admin accounts on system.
MS-SE Settings-Microsoft SpyNet
On this page you get two options, Basic membership and Advanced membership. When I first saw these options I thought Microsoft has paid version too. But when I read the description it turned out to be something different and unexpected. Even at early stage this anti-virus system has facility to send suspected files to Microsoft automatically. This was something which I had seen in some other mature anti-virus systems like ESET NOD32. Beware this can sometimes send personal information to MS, mostly unintentionally (that’s what MS says, unintentionally!). There’s no way you can disable this.
To Download This Free program Click HERE
http://www.microsoft.com/security_essentials/
Make FireFox Even Faster
Tricks To Tweak Firefox
Everybody’s favorite open-source browser, Firefox, is great right out of the box. And by adding some of the awesome extensions available out there, the browser just gets better and better.
But look under the hood, and there are a bunch of hidden (and some not-so-secret) tips and tricks available that will crank Firefox up and pimp your browser. Make it faster, cooler, more efficient. Get to be a Jedi master with the following cool Firefox tricks.
1) More screen space. Make your icons small. Go to View - Toolbars - Customize and check the “Use small icons” box
2) Smart keywords. If there’s a search you use a lot (let’s say IMDB.com’s people search), this is an awesome tool that not many people use. Right-click on the search box, select “Add a Keyword for this search”, give the keyword a name and an easy-to-type and easy-to-remember shortcut name (let’s say “actor”) and save it. Now, when you want to do an actor search, go to Firefox’s address bar, type “actor” and the name of the actor and press return. Instant search! You can do this with any search box.
3) Keyboard shortcuts
This is where you become a real Jedi. It just takes a little while to learn these, but once you do, your browsing will be super fast. Here are some of the most common (and my personal favs):
* Spacebar (page down)
* Shift-Spacebar (page up)
* Ctrl+F (find)
* Alt-N (find next)
* Ctrl+D (bookmark page)
* Ctrl+T (new tab)
* Ctrl+K (go to search box)
* Ctrl+L (go to address bar)
* Ctrl+= (increase text size)
* Ctrl+- (decrease text size)
* Ctrl-W (close tab)
* F5 (reload)
* Alt-Home (go to home page)
4) Auto-complete
This is another keyboard shortcut, but it’s not commonly known and very useful. Go to the address bar (Control-L) and type the name of the site without the “www” or the “.com”. Let’s say “google”. Then press Control-Enter, and it will automatically fill in the “www” and the “.com” and take you there - like magic! For .net addresses, press Shift-Enter, and for .org addresses, press Control-Shift-Enter.
5) Tab navigation.
Instead of using the mouse to select different tabs that you have open, use the keyboard. Here are the shortcuts:
* Ctrl+Tab (rotate forward among tabs)
* Ctrl+Shft+Tab (rotate to the previous tab)
* Ctrl+1-9 (choose a number to jump to a specific tab)
6) Mouse shortcuts.
Sometimes you’re already using your mouse and it’s easier to use a mouse shortcut than to go back to the keyboard. Master these cool ones:
* Middle click on link (opens in new tab)
* Shift-scroll down (previous page)
* Shift-scroll up (next page)
* Ctrl-scroll up (decrease text size)
* Ctrl-scroll down (increase text size)
* Middle click on a tab (closes tab)
7) Delete items from address bar history.
Firefox’s ability to automatically show previous URLs you’ve visited, as you type, in the address bar’s drop-down history menu is very cool. But sometimes you just don’t want those URLs to show up (I won’t ask why). Go to the address bar (Ctrl-L), start typing an address, and the drop-down menu will appear with the URLs of pages you’ve visited with those letters in them. Use the down-arrow to go down to an address you want to delete, and press the Delete key to make it disappear.
1. About:config - fetch only the content you view Firefox 2.0 and later likes to prepare itself for the next link you may click; to make clicked links load fast, it pre-loads content from pages which are linked to the page you’re currently viewing. Pre-fetching only occurs when the browser is idle, so it shouldn’t affect your bandwidth. Bear in mind that the makers of browser extension Fasterfox seem to think pre-fetching speeds things up. If you find this pointless and/or creepy, you can turn it off.-In about:config, pull up network.prefetch-next.
-The default value is true. Right click and toggle it to false. Restart Firefox and enjoy.
2. About:config - limit memory usage On both Macs and PCs, our favorite browser can be quite the RAM hog. Tame the beast with browser.cache.memory.capacity. This preference must be added to your list; it won’t appear by default.
-First, check your memory usage with about:cache?device=memory in the URL bar. The window will display your current settings and the current cache contents. In the settings below, Firefox’s current maximum storage size is 1 percent of the RAM capacity of the computer.
Type about:config in the address bar, Then look for the following entries, and make the corresponding changes.
1.network.http.max-connections = 64
2.network.http.max-connections-per-server =32
3.network.http.max-persistent-connections-per-proxy =16
4.network.http.max-persistent-connections-per-server = 10
5.network.http.pipelining = true
6.network.http.pipelining.maxrequests = 200
7.network.http.proxy.pipelining = true
8.network.http.proxy.version = 1.0
9.network.http.request.max-start-delay = 0
Lastly right-click anywhere and select New- Integer. Name it nglayout.initialpaint.delay and set its value to 0. This value is the amount of time the browser waits before it acts on information it recieves.
Move or remove the close tab button.
Do you accidentally click on the close button of Firefox’s tabs? You can move them or remove them, again through about:config. Edit the preference for “browser.tabs.closeButtons”. Here are the meanings of each value:
* 0: Display a close button on the active tab only
* 1:(Default) Display close buttons on all tabs
* 2:Don’t display any close buttons
* 3:Display a single close button at the end of the tab bar (Firefox 1.x behavior)
Lastly right-click anywhere and select New- Integer. Name it nglayout.initialpaint.delay and set its value to 0. This value is the amount of time the browser waits before it acts on information it recieves.
FireFox Tips 3.6.4 and Thunderbird

Clear the cache
- At the top of the Firefox window, click on the Tools menu, and select Options....
- Select the Advanced panel.
- Click on the Network tab.
- In the Offline Storage section, click .
- Click OK to close the Options window
Automatically clear the cache
You can set Firefox to automatically clear the cache when Firefox closes:- At the top of the Firefox window, click on the Tools menu, and select Options....
- Select the Privacy panel.
- In the History section, set Firefox will: to Use custom settings for history.
- Select the check box for Clear history when Firefox closes.

5.Beside Clear history when Firefox closes, click the button. The Settings for
Clearing History window will open.
6. In the Settings for Clearing History window, click the check mark box next to Cache.
7. Click to close the Settings for Clearing History window.
8. Click to close the Options window
Mozilla Thunderbird FAQ
This is the Thunderbird FAQ, which contains the most frequently asked questions about the mail client.Contents
- General Questions
- What is Thunderbird?
- Why should I use Thunderbird instead of other mail clients?
- Is Thunderbird free?
- Where can I download Thunderbird?
- How do I install Thunderbird?
- How do I uninstall Thunderbird?
- Is Thunderbird available in my language?
- Where are my bookmarks, passwords and other personal information saved?
- How do I start the Profile Manager?
- How do I move my profile or restore a backed up copy?
- Migration
- How do I migrate my Mozilla mail and settings to Thunderbird?
- Can I access my Yahoo!, Hotmail, Lycos (Europe), MailDotCom, Gmail, and Libero WebMail account through Thunderbird?
- Can I access AOL and Netscape e-mail using Thunderbird?
- How do I import e-mail messages from kmail (Linux)?
- How do I import e-mail messages from mail.app (MacOS X)?
- How do I import the address book (MacOS X)?
- How do I import e-mail messages from another mail program?
- How do I export e-mail messages to another mail program or computer?
- Usage
- How do I customize the toolbar?
- How do I make Thunderbird my default mail program?
- How do I use the spam filters?
- Does Thunderbird come with a spell checker?
- Can I use different themes for Thunderbird?
- What's the keyboard shortcut for feature [random feature]?
- Is Thunderbird susceptible to e-mail viruses?
- Is there a mail notifier in Thunderbird?
- How do I set Thunderbird to go directly to my Inbox?
- How do I use S/MIME, PGP or GnuPG to send and receive signed or encrypted messages?
- I changed my IMAP password, how do I get rid of a cached password?
- How can I access/change the Master Password?
General Questions
- What is Thunderbird?
- Thunderbird is a free, open-source and cross-platform mail client for most operating systems including, but not limited to, Windows, Linux and Macintosh. It is based on the Mozilla codebase. It is a robust and easy to use client, similar to competing products like Outlook Express, but with some major advantages such as junk mail classification. Read more about the mail client at the Product Page.
- Why should I use Thunderbird instead of other mail clients?
- There are too many reasons to list them all here. Read why you should use Thunderbird instead of other mail clients on the market.
- Is Thunderbird free?
- Yes! Thunderbird is open source software, meaning that anyone has the right to download and use the program for free, and view and modify the source code under the terms of the license.
- Where can I download Thunderbird?
- To download Thunderbird, go to mozilla.com.
- How do I install Thunderbird?
- See the release notes for more information.
- How do I uninstall Thunderbird?
- See the release notes for more information.
- Is Thunderbird available in my language?
- Possibly. Since Mozilla Thunderbird is an open-source project, contributors are constantly translating Mozilla Thunderbird into other languages. You can check if Mozilla Thunderbird is available in your language in the localized builds list.
- Where are my mail, passwords and other personal information saved?
- Thunderbird stores your personal settings in a profile folder. See the next frequently asked question for more information on how to manage the profiles.
- How do I start the Profile Manager?
- The Profile Manager is used to manage multiple profiles. To start the Profile Manager, follow the steps in the Manage Profiles How-To.
- How do I move my profile or restore a backed up copy?
- It's possible to move the location of a profile folder. This could be useful if you have a backed up profile folder somewhere on your hard drive and want to tell Thunderbird to use that as your profile. Read about moving an existing profile or restore a backed up profile for detailed instructions.
For more Tips on Mozilla and Thunderbird Click HERE to see The Full list OF FAQ
Help your PC run faster, Vista and windows 7
1. Limit how many programs run at startup
There are a lot of programs that load automatically when you boot up your PC—which can really hamper performance. To manage these programs like a pro, learn how to get a comprehensive view of what's running:
Click the Start button , and type System Configuration in the search window. Select it from the list of results.
2. Select the Startup tab. The files set to run at startup are indicated with a check mark. You can uncheck nonessential programs—but make sure you only disable programs you're familiar with. When in doubt, leave it checked.
A clean machine is a fast machine.
1. Delete things like trial software
2. Anti-virus software that your not using or did not like. Get one that suits your needs.
How to do it.
1. Click the Start button and select Control Panel.
2. Underneath Programs, click Uninstall a program. (If you don't see this page, change the View by option in the top right-hand corner to Category.)
3. Select the program you want to delete and click Uninstall.
Make ReadyBoost your friend
It's all very well to advise you to close programs you're not using—but just because you're not using it now doesn't mean you won't be using it in 10 minutes. The answer is ReadyBoost, a super helpful feature that can use the extra space on a flash card or USB storage device to speed up your PC. Plug in a compatible storage device and click Speed up my system when you see the AutoPlay dialog box.
Restart often and clean your hard disk
The more you use your PC, the more applications you use and the more services you're running. Closing an application doesn't always close the service. That's why rebooting fixes so many problems; it clears out the memory. Restart at least once a week. Your best bet? Turn off your PC every night. Not only will you clear out your memory, but you'll save energy to boot.
You should also make a habit of cleaning your hard disk to remove temporary files, emptying the Recycle Bin, and getting rid of system files you don't need any more:
1. Click the Start button , and type Disk Cleanup in the search window. Select it from the list of results.
2. After the utility runs, you'll see how much disk space you can free up.
3. Click OK, and then click Delete Files.

PC Common Problems
Locating the problem
Is your PC showing an error message? If so, write down the exact number and wording of the error message, and search for it on the Microsoft Fix it Solution Center. In many cases, the Fix it center provides a "hot fix," which is an automated solution you can run on your PC with just one click!
Even if you don’t see an error message, you may be able to find the solution in the Fix it center, either by topic or by searching. Ask yourself if the problem is related to hardware, software, or the operating system (such as Windows 7, Windows XP, or Windows Vista). The following are some common indicators that can help you decide which is the right answer.
If you're uncertain, don't worry. Just start at the top by determining if your software is working, using the Software errors section that follows. If the issue persists, proceed to the Hardware trouble section and then to the System failure section.
You can also find really helpful information at Microsoft Answers, a forum where you can search, browse, and post questions and answers. Community members – including Microsoft employees – answer the questions posted there. If you'd like to search by individual program, try the Product Solution Center.
The lists on the right side of this page may also help you narrow down the type of trouble you are experiencing.
Software errors
If programs refuse to install, won't appear on your desktop, can't seem to run without freezing, don't load at a decent speed or function properly, or Internet access is unavailable, here's how to troubleshoot:
General issues
Confirm that your PC meets the software's minimum system requirements. If it doesn't, you'll be unable to run the program without upgrading your computer's hardware. Note that PCs which barely meet or just slightly exceed these minimums may run the software more slowly and can be less reliable. Windows 7 and Windows Vista users can reference the Windows Experience Index to quickly gauge their PC's general capabilities.
Check for compatibility with Windows 7 and Windows Vista.
Close open programs and windows that you're not currently using. These can eat up system memory and processing power, slowing your PC or preventing additional software from running. Try running the program again.
Check available hard drive space. Roughly 5 to 10 percent of your hard drive's total storage allotment should be left free to ensure optimum system performance in Windows 7 and Windows Vista, prevent crashes, and keep Windows running at top speed.
Connect aTV tuner to Windows 7 Click HERE for details
Connect TV tunner to Vista
Repair your PC using the Startup Repair function.
Windows 7
Vista
Hard drive failure
In a worst-case scenario, system failure may be caused by a damaged or corrupted hard drive. There are many warning signs that may indicate this problem:
* Your system won't boot.
* No operating system is detected.
* The computer hangs during startup.
* Your PC is making strange noises.
If you are concerned about the safety of your files, try the following options before paying to send it to a data recovery specialist: Follow this link Click HERE on how to Resurrect your Crashed Hard Drive.
There are a lot of programs that load automatically when you boot up your PC—which can really hamper performance. To manage these programs like a pro, learn how to get a comprehensive view of what's running:
Click the Start button , and type System Configuration in the search window. Select it from the list of results.
2. Select the Startup tab. The files set to run at startup are indicated with a check mark. You can uncheck nonessential programs—but make sure you only disable programs you're familiar with. When in doubt, leave it checked.
A clean machine is a fast machine.
1. Delete things like trial software
2. Anti-virus software that your not using or did not like. Get one that suits your needs.
How to do it.
1. Click the Start button and select Control Panel.
2. Underneath Programs, click Uninstall a program. (If you don't see this page, change the View by option in the top right-hand corner to Category.)

3. Select the program you want to delete and click Uninstall.
Make ReadyBoost your friend
It's all very well to advise you to close programs you're not using—but just because you're not using it now doesn't mean you won't be using it in 10 minutes. The answer is ReadyBoost, a super helpful feature that can use the extra space on a flash card or USB storage device to speed up your PC. Plug in a compatible storage device and click Speed up my system when you see the AutoPlay dialog box.
Restart often and clean your hard disk
The more you use your PC, the more applications you use and the more services you're running. Closing an application doesn't always close the service. That's why rebooting fixes so many problems; it clears out the memory. Restart at least once a week. Your best bet? Turn off your PC every night. Not only will you clear out your memory, but you'll save energy to boot.
You should also make a habit of cleaning your hard disk to remove temporary files, emptying the Recycle Bin, and getting rid of system files you don't need any more:
1. Click the Start button , and type Disk Cleanup in the search window. Select it from the list of results.
2. After the utility runs, you'll see how much disk space you can free up.
3. Click OK, and then click Delete Files.

PC Common Problems
Locating the problem
Is your PC showing an error message? If so, write down the exact number and wording of the error message, and search for it on the Microsoft Fix it Solution Center. In many cases, the Fix it center provides a "hot fix," which is an automated solution you can run on your PC with just one click!
Even if you don’t see an error message, you may be able to find the solution in the Fix it center, either by topic or by searching. Ask yourself if the problem is related to hardware, software, or the operating system (such as Windows 7, Windows XP, or Windows Vista). The following are some common indicators that can help you decide which is the right answer.
If you're uncertain, don't worry. Just start at the top by determining if your software is working, using the Software errors section that follows. If the issue persists, proceed to the Hardware trouble section and then to the System failure section.
You can also find really helpful information at Microsoft Answers, a forum where you can search, browse, and post questions and answers. Community members – including Microsoft employees – answer the questions posted there. If you'd like to search by individual program, try the Product Solution Center.
The lists on the right side of this page may also help you narrow down the type of trouble you are experiencing.
Software errors
If programs refuse to install, won't appear on your desktop, can't seem to run without freezing, don't load at a decent speed or function properly, or Internet access is unavailable, here's how to troubleshoot:
General issues
Confirm that your PC meets the software's minimum system requirements. If it doesn't, you'll be unable to run the program without upgrading your computer's hardware. Note that PCs which barely meet or just slightly exceed these minimums may run the software more slowly and can be less reliable. Windows 7 and Windows Vista users can reference the Windows Experience Index to quickly gauge their PC's general capabilities.
Check for compatibility with Windows 7 and Windows Vista.
Close open programs and windows that you're not currently using. These can eat up system memory and processing power, slowing your PC or preventing additional software from running. Try running the program again.
Check available hard drive space. Roughly 5 to 10 percent of your hard drive's total storage allotment should be left free to ensure optimum system performance in Windows 7 and Windows Vista, prevent crashes, and keep Windows running at top speed.
Connect aTV tuner to Windows 7 Click HERE for details
Connect TV tunner to Vista
Repair your PC using the Startup Repair function.
Windows 7
Vista
Hard drive failure
In a worst-case scenario, system failure may be caused by a damaged or corrupted hard drive. There are many warning signs that may indicate this problem:
* Your system won't boot.
* No operating system is detected.
* The computer hangs during startup.
* Your PC is making strange noises.
If you are concerned about the safety of your files, try the following options before paying to send it to a data recovery specialist: Follow this link Click HERE on how to Resurrect your Crashed Hard Drive.
Labels:
desktop,
hard drive,
Help,
malwarebytes,
memory,
pc help,
restore,
shut down,
Tech support,
Vista,
windows 7
0
comments


Monday, April 26, 2010
Why Windows 7 Is so much Better !
1. Burn images
Windows 7 finally introduces a feature that other operating systems have had for years - the ability to burn ISO images to CDs or DVDs. And it couldn't be much easier to use. Just double-click the ISO image, choose the drive with the blank disc, click Burn and watch as your disc is created.
2. Troubleshoot problems
If some part of Windows 7 is behaving strangely, and you don't know why, then click Control Panel > Find and fix problems (or 'Troubleshooting') to access the new troubleshooting packs. These are simple wizards that will resolve common problems, check your settings, clean up your system and more.
3. Take Control
Tired of the kids installing dubious software or running applications you'd rather they left alone? AppLocker is a new Windows 7 feature that ensures users can only run the programs you specify. Don't worry, that's easier to set up than it sounds: you can create a rule to allow everything signed by a particular publisher, so choose Microsoft, say, and that one rule will let you run all signed Microsoft applications. Launch GPEDIT.MSC and go to Computer Configuration > Windows Settings > Security Settings > Application Control Policies > AppLocker to get a feel for how this works.
4. Get a power efficiency report
If you have a laptop, you can use the efficiency calculator to get Windows 7 to generate loads of useful information about its power consumption. Used in the right way, this can help you make huge gains in terms of battery life and performance. To do this you must open a command prompt as an administrator by typing 'cmd' in Start Search, and when the cmd icon appears, right-click it and choose Run as administrator.
Then at the command line, just type in 'powercfg -energy' (without quotes) and hit Return, and Windows 7 will scan your system looking for ways to improve power efficiency. It will then publish the results in an HTML file, usually in the System32 folder. Just follow the path it gives you to find your report.
5. Understanding System Restore
Using System Restore in previous versions of Windows has been something of a gamble. There's no way of telling which applications or drivers it might affect - you just have to try it and see.
Windows 7 is different. Right-click Computer, select Properties > System Protection > System Restore > Next, and choose the restore point you'd like to use. Click the new button to 'Scan for affected programs' and Windows will tell you which (if any) programs and drivers will be deleted or recovered by selecting this restore point.
6. Set the time zone
System administrators will appreciate the new command line tzutil.exe utility, which lets you set a PC's time zone from scripts. If you wanted to set a PC to Greenwich Mean Time, for instance, you'd use the command
tzutil /s "gmt standard time"
The command "tzutil /g" displays the current time zone, "tzutil /l" lists all possible time zones, and "tzutil /?" displays details on how the command works.
7. Calibrate your screen
The colours you see on your screen will vary depending on your monitor, graphics cards settings, lighting and more, yet most people use the same default Windows colour profile. And that means a digital photo you think looks perfect might appear very poor to everybody else. Fortunately Windows 7 now provides a Display Colour Calibration Wizard that helps you properly set up your brightness, contrast and colour settings, and a ClearType tuner to ensure text is crisp and sharp. Click Start, type DCCW and press Enter to give it a try.
8. Clean up Live Essentials
Installing Windows Live Essentials will get you the new versions of Mail, Movie Maker, Photo Gallery and others - great. Unfortunately it also includes other components that may be unnecessary, but if you like to keep a clean system then these can be quickly removed.
If you left the default "Set your search provider" option selected during installation, for instance, Windows Live will install Choice Guard, a tool to set your browser home page and search engine, and prevent other programs from changing them. If this causes problems later, or you just decide you don't need it, then Choice Guard may be removed by clicking Start, typing msiexec /x and pressing [Enter].
Windows Live Essentials also adds an ActiveX Control to help upload your files to Windows Live SkyDrive, as well as the Windows Live Sign-in Assistant, which makes it easier to manage and switch between multiple Windows Live accounts. If you're sure you'll never need either then remove them with the Control Panel "Uninstall a Program" applet.
9. Add network support
By default Windows Live MovieMaker won't let you import files over a network, but a quick Registry tweak will change this. Run REGEDIT, browse to HKEY_CURRENT_USER\Software\Microsoft\Windows Live\Movie Maker, add a DWORD value called AllowNetworkFiles and set it to 1 to add network support
10. Activate XP mode
If you've old but important software that no longer runs under Windows 7, then you could try using XP Mode, a virtual copy of XP that runs in a window on your Windows 7 desktop. But there's a big potential problem, as XP Mode only works with systems that have hardware virtualisation (AMD-V or Intel VT) built-in and turned on. If you've a compatible CPU then this may just be a matter of enabling the option in your BIOS set-up program, however some high profile brands, including Sony Vaio, disable the setting for "security reasons". And that blocks XP Mode from working, too.
One solution has emerged, but it's a little risky, as essentially you'll have to alter a byte in your laptop firmware and hope this doesn't have any unexpected side-effects. Gulp.
A safer approach might be to use VirtualBox, a virtualisation tool that doesn't insist on hardware support, but then you will need to find a licensed copy of XP (or whatever other Windows version your software requires) for its virtual machine.
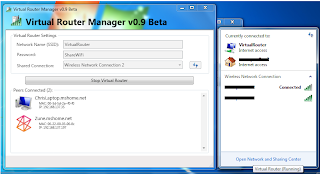
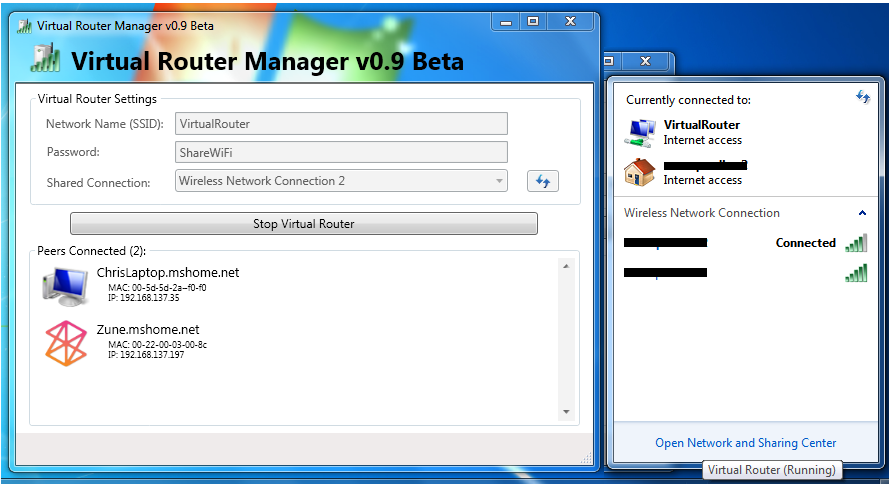
11. Enable virtual Wi-Fi
This will Enable you to lose the Router.
Windows 7 includes a little-known new feature called Virtual Wi-Fi, which effectively turns your PC or laptop into a software-based router. Any other Wi-Fi-enabled devices within range - a desktop, laptop, an iPod perhaps - will "see" you as a new network and, once logged on, immediately be able to share your internet connection.
This will only work if your wireless adapter driver supports it, though, and not all do. Check with your adapter manufacturer and make sure you've installed the very latest drivers to give you the best chance.
Once you have driver support then the easiest approach is to get a network tool that can set up virtual Wi-Fi for you. Virtual Router (below) is free, easy to use and should have you sharing your internet connection very quickly.
12. Right-click everything
At first glance Windows 7 bears a striking resemblance to Vista, but there's an easy way to begin spotting the differences - just right-click things.
Right-click an empty part of the desktop, for instance, and you'll find a menu entry to set your screen resolution. No need to go browsing through the display settings any more.
Right-click the Explorer icon on the taskbar for speedy access to common system folders: Documents, Pictures, the Windows folder, and more.
And if you don't plan on using Internet Explorer then you probably won't want its icon permanently displayed on the taskbar. Right-click the icon, select 'Unpin this program from the taskbar', then go install Firefox, instead.
13. Display the old taskbar button context menu
Right-click a taskbar button, though, and you'll now see its jumplist menu. That's a useful new feature, but not much help if you want to access the minimize, maximize, or move options that used to be available. Fortunately there's an easy way to get the old context menu back - just hold down Ctrl and Shift as you right-click the taskbar button.
Customise the log-on screen
Changing the Windows log-on screen used to involve some complicated and potentially dangerous hacks, but not any more - Windows 7 makes it easy.
First, browse to HKEY_LOCAL_MACHINE\Software\Microsoft\Windows\CurrentVersion\Authentication\LogonUI\Background in REGEDIT, double-click the DWORD key called OEMBackground (not there? Create it) and set its value to 1.
Now find a background image you'd like to use. Make sure it's less than 256KB in size, and matches the aspect ratio of your screen as it'll be stretched to fit.
Next, copy that image into the %windir%\system32\oobe\info\backgrounds folder (create the info\backgrounds folders if they don't exist). Rename the image to backgroundDefault.jpg, reboot, and you should now have a custom log-on image.
Alternatively, use a free tweaking tool to handle everything for you. Logon Changer displays a preview so you can see how the log-on screen will look without rebooting, while the Logon Screen Rotator accepts multiple images and will display a different one every time you log on.
14. Recover screen space
The new Windows 7 taskbar acts as one big quick launch toolbar that can hold whatever program shortcuts you like (just right-click one and select Pin To Taskbar). And that's fine, except it does consume a little more screen real estate than we'd like. Shrink it to a more manageable size by right-clicking the Start orb, then Properties > Taskbar > Use small icons > OK.
15. Enjoy a retro taskbar
Windows 7 now combines taskbar buttons in a way that saves space, but also makes it more difficult to tell at a glance whether an icon represents a running application or a shortcut. If you prefer a more traditional approach, then right-click the taskbar, select Properties, and set Taskbar Buttons to "Combine when taskbar is full". You'll now get a clear and separate button for each running application, making them much easier to identify.
16. Remove taskbar buttons
One problem with the previous tip is the buttons will gobble up valuable taskbar real estate, but you can reduce the impact of this by removing their text captions. Launch REGEDIT, browse to HKEY_CURRENT_USER\Control Panel\Desktop\WindowMetrics, add a string called MinWidth, set it to 54, and reboot to see the results.
17. Restore the Quick Launch Toolbar
If you're unhappy with the new taskbar, even after shrinking it, then it only takes a moment to restore the old Quick Launch Toolbar.
Right-click the taskbar, choose Toolbars > New Toolbar, type "%UserProfile%\AppData\Roaming\Microsoft\Internet Explorer\Quick Launch" (less the quotes) into the Folder box and click Select Folder.
Now right-click the taskbar, clear 'Lock the taskbar', and you should see the Quick Launch toolbar, probably to the right. Right-click its divider, clear Show Text and Show Title to minimise the space it takes up. Complete the job by right-clicking the bar and selecting View > Small Icons for the true retro look.
18. Custom power switch
By default, Windows 7 displays a plain text 'Shut down' button on the Start menu, but it only takes a moment to change this action to something else. If you reboot your PC a few times every day then that might make more sense as a default action: right-click the Start orb, select Properties and set the 'Power boot action' to 'Restart' to make it happen.
19. Auto arrange your desktop
If your Windows 7 desktop has icons scattered everywhere then you could right-click it and select View > Auto arrange, just as in Vista. But a simpler solution is just to press and hold down F5, and Windows will automatically arrange its icons for you.
20. Disable smart window arrangement
Windows 7 features interesting new ways to intelligently arrange your windows, so that (for example) if you drag a window to the top of the screen then it will maximise. We like the new system, but if you find it distracting then it's easily disabled. Run REGEDIT, go to HKEY_CURRENT_USER\Control Panel\Desktop, set WindowArrangementActive to 0, reboot, and your windows will behave just as they always did.
21. Browse your tasks
If you prefer the keyboard over the mouse, you will love browsing the taskbar using this nifty shortcut. Press Windows and T, and you move the focus to the left-most icon on the taskbar. Then use your arrow keys to change the focus to other icons, and you get a live preview of every window.
22. Display your drives
Click Computer in Windows 7 and you might see a strange lack of drives, but don't panic, it's just Microsoft trying to be helpful: drives like memory card readers are no longer displayed if they're empty. We think it's an improvement, but if you disagree then it's easy to get your empty drives back. Launch Explorer, click Tools > Folder Options > View and clear 'Hide empty drives in the computer folder'.
23. See more detail
The new and improved Windows 7 magnifier offers a much easier way to zoom in on any area of the screen. Launch it and you can now define a scale factor and docking position, and once activated it can track your keyboard focus around the screen. Press Tab as you move around a dialog box, say, and it'll automatically zoom in on the currently active control.
24. Hiding the Windows Live Messenger icon
If you use Windows Live Messenger a lot, you'll have noticed that the icon now resides on the taskbar, where you can easily change status and quickly send an IM to someone. If you prefer to keep Windows Live Messenger in the system tray, where it's been for previous releases, just close Windows Live Messenger, edit the shortcut properties and set the application to run in Windows Vista compatibility mode.
25. Customise UAC
Windows Vista's User Account Control was a good idea in practice, but poor implementation put many people off - it raised far too many alerts. Fortunately Windows 7 displays less warnings by default, and lets you further fine-tune UAC to suit your preferred balance between security and a pop-up free life (Start > Control Panel > Change User Account Control Settings).
26. Use Sticky Notes
The Sticky Notes app is both simpler and more useful in Windows 7. Launch StikyNot.exe and you can type notes at the keyboard; right-click a note to change its colour; click the + sign on the note title bar to add another note; and click a note and press Alt + 4 to close the note windows (your notes are automatically saved).
27. Open folder in new process
By default Windows 7 opens folders in the same process. This saves system resources, but means one folder crash can bring down the entire shell. If your system seems unstable, or you're doing something in Explorer that regularly seems to causes crashes, then open Computer, hold down Shift, right-click on your drive and select Open in New Process. The folder will now be launched in a separate process, and so a crash is less likely to affect anything else.
28. Watch more videos
Windows Media Player 12 is a powerful program, but it still won't play all the audio and video files you'll find online. Fortunately the first freeware Windows 7 codecs package [shark007.net/win7codecs.html] has been released, and installing it could get your troublesome multimedia files playing again.
29. Preview fonts
Open the Fonts window in Windows XP and Vista and you'll see the font names, probably with icons to tell you whether they're TrueType or OpenType, but that's about it. Windows 7 sees some useful font-related improvements.
Open the new fonts window and you'll find a little preview for every font, giving you a quick idea of how they're going to look.
The tedium of scrolling through multiple entries for each family, like Times New Roman, Times New Roman Bold, Times New Roman Bold Italic and so on, has finally ended. There's now just a single entry for each font (though you can still see all other members of the family).
And there's a new OpenType font, Gabriola, added to the mix. It's an attractive script font, well worth a try the next time you need a stylish document that stands out from the crowd.
30. Restore your gadgets
Windows 7 has tightened up its security by refusing to run gadgets if UAC has been turned off, so limiting the damage malicious unsigned gadgets can do to your system. If you've disabled UAC, miss your gadgets and are happy to accept the security risk, though, there's an easy Registry way to get everything back to normal. Run REGEDIT, go to HKEY_LOCAL_MACHINE\SOFTWARE\Microsoft\Windows\CurrentVersion\Sidebar\Settings, create a new DWORD value called AllowElevatedProcess and set it to 1. Your gadgets should start working again right away.
31. New WordPad formats
By default WordPad will save documents in Rich Text Format, just as before. But browse the Save As Format list and you'll see you can also save (or open, actually) files in the Office 2007 .docx or OpenDocument .odt formats.
32. Disable hibernation
By default Windows 7 will permanently consume a chunk of your hard drive with its hibernation file, but if you never use sleep, and always turn your PC off, then this will never actually be used. To disable hibernation and recover a little hard drive space, launch REGEDIT, browse to HKEY_LOCAL_MACHINE\SYSTEM\CurrentControlSet\Control\Power, then set both HibernateEnabled and HiberFileSizePerfect to zero.
33. Fix Explorer
The Windows 7 Explorer has a couple of potential annoyances. Launching Computer will no longer display system folders like Control Panel or Recycle Bin, for instance. And if you're drilling down through a complicated folder structure in the right-hand pane of Explorer, the left-hand tree won't always expand to follow what you're doing, which can make it more difficult to see exactly where you are. Fortunately there's a quick fix: click Organize > Folder and Search Options, check "Show all folders" and "Automatically expand to current folder", and click OK.
34. Faster file handing
If you hold down Shift while right-clicking a file in Explorer, then you'll find the Send To file now includes all your main user folders: Contacts, Documents, Downloads, Music and more. Choose any of these and your file will be moved there immediately.
35. Alt+Tab
As in Vista it still works to cycle through open pages (folders and Websites)
36. Load IE faster
Some Internet Explorer add-ons can take a while to start, dragging down the browser's performance, but at least IE8 can now point a finger at the worst resource hogs. Click Tools > Manage Add-ons, check the Load Time in the right-hand column, and you'll immediately see which browser extensions are slowing you down.
37. Schedule Media Centre downloads
You can now tell Windows Media Centre to download data at a specific time, perhaps overnight, a useful way to prevent it sapping your bandwidth for the rest of the day. Launch Media Centre, go to Tasks > Settings > General > Automatic Download Options, and set the download start and stop times that you'd like it to use.
38. Keyboard shortcuts
Windows 7 supports several useful new keyboard shortcuts.
Alt+P
Display/ hide the Explorer preview pane
Windows Logo+G
Display gadgets in front of other windows
Windows Logo++ (plus key)
Zoom in, where appropriate
Windows Logo+- (minus key)
Zoom out, where appropriate
Windows Logo+Up
Maximise the current window
Windows Logo+Down
Minimise the current window
Windows Logo+Left
Snap to the left hand side of the screen
Windows Logo+Right
Snap to the right hand side of the screen
Windows Logo+Home
Minimise/ restore everything except the current window
39. Find bottlenecks
From what we've seen so far Windows 7 is already performing better than Vista, but if your PC seems sluggish then it's now much easier to uncover the bottleneck. Click Start, type RESMON and press Enter to launch the Resource Monitor, then click the CPU, Memory, Disk or Network tabs. Windows 7 will immediately show which processes are hogging the most system resources.
The CPU view is particularly useful, and provides something like a more powerful version of Task Manager. If a program has locked up, for example, then right-click its name in the list and select Analyze Process. Windows will then try to tell you why it's hanging - the program might be waiting for another process, perhaps - which could give you the information you need to fix the problem.

Hope These tips Help.
Windows 7 finally introduces a feature that other operating systems have had for years - the ability to burn ISO images to CDs or DVDs. And it couldn't be much easier to use. Just double-click the ISO image, choose the drive with the blank disc, click Burn and watch as your disc is created.
2. Troubleshoot problems
If some part of Windows 7 is behaving strangely, and you don't know why, then click Control Panel > Find and fix problems (or 'Troubleshooting') to access the new troubleshooting packs. These are simple wizards that will resolve common problems, check your settings, clean up your system and more.
3. Take Control
Tired of the kids installing dubious software or running applications you'd rather they left alone? AppLocker is a new Windows 7 feature that ensures users can only run the programs you specify. Don't worry, that's easier to set up than it sounds: you can create a rule to allow everything signed by a particular publisher, so choose Microsoft, say, and that one rule will let you run all signed Microsoft applications. Launch GPEDIT.MSC and go to Computer Configuration > Windows Settings > Security Settings > Application Control Policies > AppLocker to get a feel for how this works.
4. Get a power efficiency report
If you have a laptop, you can use the efficiency calculator to get Windows 7 to generate loads of useful information about its power consumption. Used in the right way, this can help you make huge gains in terms of battery life and performance. To do this you must open a command prompt as an administrator by typing 'cmd' in Start Search, and when the cmd icon appears, right-click it and choose Run as administrator.
Then at the command line, just type in 'powercfg -energy' (without quotes) and hit Return, and Windows 7 will scan your system looking for ways to improve power efficiency. It will then publish the results in an HTML file, usually in the System32 folder. Just follow the path it gives you to find your report.
5. Understanding System Restore
Using System Restore in previous versions of Windows has been something of a gamble. There's no way of telling which applications or drivers it might affect - you just have to try it and see.
Windows 7 is different. Right-click Computer, select Properties > System Protection > System Restore > Next, and choose the restore point you'd like to use. Click the new button to 'Scan for affected programs' and Windows will tell you which (if any) programs and drivers will be deleted or recovered by selecting this restore point.
6. Set the time zone
System administrators will appreciate the new command line tzutil.exe utility, which lets you set a PC's time zone from scripts. If you wanted to set a PC to Greenwich Mean Time, for instance, you'd use the command
tzutil /s "gmt standard time"
The command "tzutil /g" displays the current time zone, "tzutil /l" lists all possible time zones, and "tzutil /?" displays details on how the command works.
7. Calibrate your screen
The colours you see on your screen will vary depending on your monitor, graphics cards settings, lighting and more, yet most people use the same default Windows colour profile. And that means a digital photo you think looks perfect might appear very poor to everybody else. Fortunately Windows 7 now provides a Display Colour Calibration Wizard that helps you properly set up your brightness, contrast and colour settings, and a ClearType tuner to ensure text is crisp and sharp. Click Start, type DCCW and press Enter to give it a try.
8. Clean up Live Essentials
Installing Windows Live Essentials will get you the new versions of Mail, Movie Maker, Photo Gallery and others - great. Unfortunately it also includes other components that may be unnecessary, but if you like to keep a clean system then these can be quickly removed.
If you left the default "Set your search provider" option selected during installation, for instance, Windows Live will install Choice Guard, a tool to set your browser home page and search engine, and prevent other programs from changing them. If this causes problems later, or you just decide you don't need it, then Choice Guard may be removed by clicking Start, typing msiexec /x and pressing [Enter].
Windows Live Essentials also adds an ActiveX Control to help upload your files to Windows Live SkyDrive, as well as the Windows Live Sign-in Assistant, which makes it easier to manage and switch between multiple Windows Live accounts. If you're sure you'll never need either then remove them with the Control Panel "Uninstall a Program" applet.
9. Add network support
By default Windows Live MovieMaker won't let you import files over a network, but a quick Registry tweak will change this. Run REGEDIT, browse to HKEY_CURRENT_USER\Software\Microsoft\Windows Live\Movie Maker, add a DWORD value called AllowNetworkFiles and set it to 1 to add network support
10. Activate XP mode
If you've old but important software that no longer runs under Windows 7, then you could try using XP Mode, a virtual copy of XP that runs in a window on your Windows 7 desktop. But there's a big potential problem, as XP Mode only works with systems that have hardware virtualisation (AMD-V or Intel VT) built-in and turned on. If you've a compatible CPU then this may just be a matter of enabling the option in your BIOS set-up program, however some high profile brands, including Sony Vaio, disable the setting for "security reasons". And that blocks XP Mode from working, too.
One solution has emerged, but it's a little risky, as essentially you'll have to alter a byte in your laptop firmware and hope this doesn't have any unexpected side-effects. Gulp.
A safer approach might be to use VirtualBox, a virtualisation tool that doesn't insist on hardware support, but then you will need to find a licensed copy of XP (or whatever other Windows version your software requires) for its virtual machine.
11. Enable virtual Wi-Fi
This will Enable you to lose the Router.
Windows 7 includes a little-known new feature called Virtual Wi-Fi, which effectively turns your PC or laptop into a software-based router. Any other Wi-Fi-enabled devices within range - a desktop, laptop, an iPod perhaps - will "see" you as a new network and, once logged on, immediately be able to share your internet connection.
This will only work if your wireless adapter driver supports it, though, and not all do. Check with your adapter manufacturer and make sure you've installed the very latest drivers to give you the best chance.
Once you have driver support then the easiest approach is to get a network tool that can set up virtual Wi-Fi for you. Virtual Router (below) is free, easy to use and should have you sharing your internet connection very quickly.
12. Right-click everything
At first glance Windows 7 bears a striking resemblance to Vista, but there's an easy way to begin spotting the differences - just right-click things.
Right-click an empty part of the desktop, for instance, and you'll find a menu entry to set your screen resolution. No need to go browsing through the display settings any more.
Right-click the Explorer icon on the taskbar for speedy access to common system folders: Documents, Pictures, the Windows folder, and more.
And if you don't plan on using Internet Explorer then you probably won't want its icon permanently displayed on the taskbar. Right-click the icon, select 'Unpin this program from the taskbar', then go install Firefox, instead.
13. Display the old taskbar button context menu
Right-click a taskbar button, though, and you'll now see its jumplist menu. That's a useful new feature, but not much help if you want to access the minimize, maximize, or move options that used to be available. Fortunately there's an easy way to get the old context menu back - just hold down Ctrl and Shift as you right-click the taskbar button.
Customise the log-on screen
Changing the Windows log-on screen used to involve some complicated and potentially dangerous hacks, but not any more - Windows 7 makes it easy.
First, browse to HKEY_LOCAL_MACHINE\Software\Microsoft\Windows\CurrentVersion\Authentication\LogonUI\Background in REGEDIT, double-click the DWORD key called OEMBackground (not there? Create it) and set its value to 1.
Now find a background image you'd like to use. Make sure it's less than 256KB in size, and matches the aspect ratio of your screen as it'll be stretched to fit.
Next, copy that image into the %windir%\system32\oobe\info\backgrounds folder (create the info\backgrounds folders if they don't exist). Rename the image to backgroundDefault.jpg, reboot, and you should now have a custom log-on image.
Alternatively, use a free tweaking tool to handle everything for you. Logon Changer displays a preview so you can see how the log-on screen will look without rebooting, while the Logon Screen Rotator accepts multiple images and will display a different one every time you log on.
14. Recover screen space
The new Windows 7 taskbar acts as one big quick launch toolbar that can hold whatever program shortcuts you like (just right-click one and select Pin To Taskbar). And that's fine, except it does consume a little more screen real estate than we'd like. Shrink it to a more manageable size by right-clicking the Start orb, then Properties > Taskbar > Use small icons > OK.
15. Enjoy a retro taskbar
Windows 7 now combines taskbar buttons in a way that saves space, but also makes it more difficult to tell at a glance whether an icon represents a running application or a shortcut. If you prefer a more traditional approach, then right-click the taskbar, select Properties, and set Taskbar Buttons to "Combine when taskbar is full". You'll now get a clear and separate button for each running application, making them much easier to identify.
16. Remove taskbar buttons
One problem with the previous tip is the buttons will gobble up valuable taskbar real estate, but you can reduce the impact of this by removing their text captions. Launch REGEDIT, browse to HKEY_CURRENT_USER\Control Panel\Desktop\WindowMetrics, add a string called MinWidth, set it to 54, and reboot to see the results.
17. Restore the Quick Launch Toolbar
If you're unhappy with the new taskbar, even after shrinking it, then it only takes a moment to restore the old Quick Launch Toolbar.
Right-click the taskbar, choose Toolbars > New Toolbar, type "%UserProfile%\AppData\Roaming\Microsoft\Internet Explorer\Quick Launch" (less the quotes) into the Folder box and click Select Folder.
Now right-click the taskbar, clear 'Lock the taskbar', and you should see the Quick Launch toolbar, probably to the right. Right-click its divider, clear Show Text and Show Title to minimise the space it takes up. Complete the job by right-clicking the bar and selecting View > Small Icons for the true retro look.
18. Custom power switch
By default, Windows 7 displays a plain text 'Shut down' button on the Start menu, but it only takes a moment to change this action to something else. If you reboot your PC a few times every day then that might make more sense as a default action: right-click the Start orb, select Properties and set the 'Power boot action' to 'Restart' to make it happen.
19. Auto arrange your desktop
If your Windows 7 desktop has icons scattered everywhere then you could right-click it and select View > Auto arrange, just as in Vista. But a simpler solution is just to press and hold down F5, and Windows will automatically arrange its icons for you.
20. Disable smart window arrangement
Windows 7 features interesting new ways to intelligently arrange your windows, so that (for example) if you drag a window to the top of the screen then it will maximise. We like the new system, but if you find it distracting then it's easily disabled. Run REGEDIT, go to HKEY_CURRENT_USER\Control Panel\Desktop, set WindowArrangementActive to 0, reboot, and your windows will behave just as they always did.
21. Browse your tasks
If you prefer the keyboard over the mouse, you will love browsing the taskbar using this nifty shortcut. Press Windows and T, and you move the focus to the left-most icon on the taskbar. Then use your arrow keys to change the focus to other icons, and you get a live preview of every window.
22. Display your drives
Click Computer in Windows 7 and you might see a strange lack of drives, but don't panic, it's just Microsoft trying to be helpful: drives like memory card readers are no longer displayed if they're empty. We think it's an improvement, but if you disagree then it's easy to get your empty drives back. Launch Explorer, click Tools > Folder Options > View and clear 'Hide empty drives in the computer folder'.
23. See more detail
The new and improved Windows 7 magnifier offers a much easier way to zoom in on any area of the screen. Launch it and you can now define a scale factor and docking position, and once activated it can track your keyboard focus around the screen. Press Tab as you move around a dialog box, say, and it'll automatically zoom in on the currently active control.
24. Hiding the Windows Live Messenger icon
If you use Windows Live Messenger a lot, you'll have noticed that the icon now resides on the taskbar, where you can easily change status and quickly send an IM to someone. If you prefer to keep Windows Live Messenger in the system tray, where it's been for previous releases, just close Windows Live Messenger, edit the shortcut properties and set the application to run in Windows Vista compatibility mode.
25. Customise UAC
Windows Vista's User Account Control was a good idea in practice, but poor implementation put many people off - it raised far too many alerts. Fortunately Windows 7 displays less warnings by default, and lets you further fine-tune UAC to suit your preferred balance between security and a pop-up free life (Start > Control Panel > Change User Account Control Settings).
26. Use Sticky Notes
The Sticky Notes app is both simpler and more useful in Windows 7. Launch StikyNot.exe and you can type notes at the keyboard; right-click a note to change its colour; click the + sign on the note title bar to add another note; and click a note and press Alt + 4 to close the note windows (your notes are automatically saved).
27. Open folder in new process
By default Windows 7 opens folders in the same process. This saves system resources, but means one folder crash can bring down the entire shell. If your system seems unstable, or you're doing something in Explorer that regularly seems to causes crashes, then open Computer, hold down Shift, right-click on your drive and select Open in New Process. The folder will now be launched in a separate process, and so a crash is less likely to affect anything else.
28. Watch more videos
Windows Media Player 12 is a powerful program, but it still won't play all the audio and video files you'll find online. Fortunately the first freeware Windows 7 codecs package [shark007.net/win7codecs.html] has been released, and installing it could get your troublesome multimedia files playing again.
29. Preview fonts
Open the Fonts window in Windows XP and Vista and you'll see the font names, probably with icons to tell you whether they're TrueType or OpenType, but that's about it. Windows 7 sees some useful font-related improvements.
Open the new fonts window and you'll find a little preview for every font, giving you a quick idea of how they're going to look.
The tedium of scrolling through multiple entries for each family, like Times New Roman, Times New Roman Bold, Times New Roman Bold Italic and so on, has finally ended. There's now just a single entry for each font (though you can still see all other members of the family).
And there's a new OpenType font, Gabriola, added to the mix. It's an attractive script font, well worth a try the next time you need a stylish document that stands out from the crowd.
30. Restore your gadgets
Windows 7 has tightened up its security by refusing to run gadgets if UAC has been turned off, so limiting the damage malicious unsigned gadgets can do to your system. If you've disabled UAC, miss your gadgets and are happy to accept the security risk, though, there's an easy Registry way to get everything back to normal. Run REGEDIT, go to HKEY_LOCAL_MACHINE\SOFTWARE\Microsoft\Windows\CurrentVersion\Sidebar\Settings, create a new DWORD value called AllowElevatedProcess and set it to 1. Your gadgets should start working again right away.
31. New WordPad formats
By default WordPad will save documents in Rich Text Format, just as before. But browse the Save As Format list and you'll see you can also save (or open, actually) files in the Office 2007 .docx or OpenDocument .odt formats.
32. Disable hibernation
By default Windows 7 will permanently consume a chunk of your hard drive with its hibernation file, but if you never use sleep, and always turn your PC off, then this will never actually be used. To disable hibernation and recover a little hard drive space, launch REGEDIT, browse to HKEY_LOCAL_MACHINE\SYSTEM\CurrentControlSet\Control\Power, then set both HibernateEnabled and HiberFileSizePerfect to zero.
33. Fix Explorer
The Windows 7 Explorer has a couple of potential annoyances. Launching Computer will no longer display system folders like Control Panel or Recycle Bin, for instance. And if you're drilling down through a complicated folder structure in the right-hand pane of Explorer, the left-hand tree won't always expand to follow what you're doing, which can make it more difficult to see exactly where you are. Fortunately there's a quick fix: click Organize > Folder and Search Options, check "Show all folders" and "Automatically expand to current folder", and click OK.
34. Faster file handing
If you hold down Shift while right-clicking a file in Explorer, then you'll find the Send To file now includes all your main user folders: Contacts, Documents, Downloads, Music and more. Choose any of these and your file will be moved there immediately.
35. Alt+Tab
As in Vista it still works to cycle through open pages (folders and Websites)
36. Load IE faster
Some Internet Explorer add-ons can take a while to start, dragging down the browser's performance, but at least IE8 can now point a finger at the worst resource hogs. Click Tools > Manage Add-ons, check the Load Time in the right-hand column, and you'll immediately see which browser extensions are slowing you down.
37. Schedule Media Centre downloads
You can now tell Windows Media Centre to download data at a specific time, perhaps overnight, a useful way to prevent it sapping your bandwidth for the rest of the day. Launch Media Centre, go to Tasks > Settings > General > Automatic Download Options, and set the download start and stop times that you'd like it to use.
38. Keyboard shortcuts
Windows 7 supports several useful new keyboard shortcuts.
Alt+P
Display/ hide the Explorer preview pane
Windows Logo+G
Display gadgets in front of other windows
Windows Logo++ (plus key)
Zoom in, where appropriate
Windows Logo+- (minus key)
Zoom out, where appropriate
Windows Logo+Up
Maximise the current window
Windows Logo+Down
Minimise the current window
Windows Logo+Left
Snap to the left hand side of the screen
Windows Logo+Right
Snap to the right hand side of the screen
Windows Logo+Home
Minimise/ restore everything except the current window
39. Find bottlenecks
From what we've seen so far Windows 7 is already performing better than Vista, but if your PC seems sluggish then it's now much easier to uncover the bottleneck. Click Start, type RESMON and press Enter to launch the Resource Monitor, then click the CPU, Memory, Disk or Network tabs. Windows 7 will immediately show which processes are hogging the most system resources.
The CPU view is particularly useful, and provides something like a more powerful version of Task Manager. If a program has locked up, for example, then right-click its name in the list and select Analyze Process. Windows will then try to tell you why it's hanging - the program might be waiting for another process, perhaps - which could give you the information you need to fix the problem.

Hope These tips Help.
Sunday, April 25, 2010
Windows 8 or Windows.Next ?
Windows 8( Windows.Next) is a future version of Microsoft Windows, expected for release in 2012 or later.[1] It will succeed Windows 7. It will be built on the same kernel MinWin in which the Windows 7 is being developed.
 In Windows 8,(Windows.Next) there is going to be a complete overhaul of the user interface. A new user experience is being developed for Windows 8. According to some sources, Windows 8 will not include Windows Explorer.
 Windows 8 is planned to bring a revamp of Windows Test Technologies (WTT), the technologies used to test Windows. The WTT team wants to address all the major testing problems by developing a "truly scalable and reliable testing infrastructure.
Maybe Windows Can learn something from Linux, The Operating System Is free for one thing.
If you have Never used or seen linux or Ubuntu it is a nice Program for Free. But not for the average user.
For Most people the ones that like to surf the net and Just check their Emails or play a game online. Ubuntu might not be for them, Now for the Geeks if you will or the more tech users if not or should be using this OS.
As good as it is I'm just surprised it's Free. Now you can even Get it installed when you buy a new computer. HP offers it.

The End Is Near For XP
Windows XP, the world’s most used operating system. Fast, clean and rock solid, it’s great for getting stuff done. However, like all good things, it has to come to an end.
Windows XP mysteriously dissaperaed from all store shelves last June, however, like all Microsoft’s products, it continued to receive support for about a year afterwards. Then, it happened.
As of today all mainstream Windows XP users will get almost completely cut off from support. Only critical updates will be received. People who want to continue to get support will have to pay for Microsoft’s extended service plan, which ends April 8,2014. Then it’s hello Windows 7!
Personal users and Business will need to get ready to Update their systems after 4/08/2014 since none will be available to them for Windows XP Can we say R.I.P. XP !


Maybe Windows Can learn something from Linux, The Operating System Is free for one thing.
If you have Never used or seen linux or Ubuntu it is a nice Program for Free. But not for the average user.
For Most people the ones that like to surf the net and Just check their Emails or play a game online. Ubuntu might not be for them, Now for the Geeks if you will or the more tech users if not or should be using this OS.
As good as it is I'm just surprised it's Free. Now you can even Get it installed when you buy a new computer. HP offers it.
Take a Tour of Ubuntu Click HERE
The End Is Near For XP
Windows XP, the world’s most used operating system. Fast, clean and rock solid, it’s great for getting stuff done. However, like all good things, it has to come to an end.
Windows XP mysteriously dissaperaed from all store shelves last June, however, like all Microsoft’s products, it continued to receive support for about a year afterwards. Then, it happened.
As of today all mainstream Windows XP users will get almost completely cut off from support. Only critical updates will be received. People who want to continue to get support will have to pay for Microsoft’s extended service plan, which ends April 8,2014. Then it’s hello Windows 7!
Personal users and Business will need to get ready to Update their systems after 4/08/2014 since none will be available to them for Windows XP Can we say R.I.P. XP !
Saturday, April 24, 2010
Windows 7,Tips You should know
Here is one for the People that Need help on Windows 7 that are having problems with something and can't explain whats Going on. It's a screen shot program Built into windows 7 and then zipped into a .Zip file for easy email applications.


You start this program by going to the start button at typing in psr.exe and then hit enter.
The above is a picture of what it will look like when it is opened, Then you can click on record and it will record your screen, Then when finished click on stop and it will save the file in HTML (zipped).
You can send it to anyone to open it and review it, For tech purposes or training, Or maybe you just want to share something.
windows + Shift + left and Windows + Shift + right
These keys will move the window to another Screen if you are using Dual screens on your system for the Screen that is active. Also Using just the Windows + Right will ( No Shift ) will Move the active window to the right (Tile)
One Screen
Windows + Left = The active Windows will Tile to the left side of the screen
Windows + Right = The Active windows Tiles to the right side
Windows + UP = The active windows Tiles Top to bottom
Windows + Down = The active Window will minimize
Task Bar
The Task bar as you know if you are using Windows 7 is a bit different and To me is a more use full tool when you have more then one window open
When you mouse over the Icons in the task bar you see a small Preview of what is running, If you have more then one Internet Explorer windows open it pans them out so you can see all of them and move your mouse to the one you want to see ( bring to front)
Another Short cut is Windows + Number
This is for the Icons on the task bar. As you can see the numbers I have placed on this picture then it would correspond with that Icon.
Pin to task bar
This is a nice way to make you icons on the task bar. If you have a program open that you might use often and do not want to keep going to the Start menu or to your desktop.
1. Once the program is opened
2. right Click on the icon that corresponds with the program on the task bar and Click on pin.
Now once you close the program the Icon will remain on the task bar.
Also if you have a shortcut you can drag it to the task bar as well.
Friday, April 23, 2010
Play Your Media on Any Device
There are so many different file formats available, and each song or video always seems to be in a format that's not playable unless you jump through hoops and install new software and codecs each time. With a file conversion program, you can take a media file and make it playable on almost any device. That comes in very handy when you want to email videos or songs you've made to your friends, but they don't have the program that can play the format you saved it in.
With Convert Genius, you can just change it into a format everyone has, like Quicktime, and never have to worry about your friends not being able to see the wonderful two hours of family movies you just sent them. For me, that means I can take my Flip Video movies and play them back on my iPhone.
Convert Genius is an easy-to-use media conversion tool that allows us to handle a variety of media files, providing good quality results. The application stands out mainly for the wide number of formats supported. It is possible to convert among popular audio files like MP3, WAV, WMA, OGG and other formats, and also among the most widely used video file types, such as DiVX, WMV, MP4, MOV, 3GP and more. For each output format we can specify the video/audio encoder, audio and video bit rate, aspect ratio, and other advanced settings.
The application's interface has a quite sophisticated look, and is very intuitive; you simply have to select the files you want to convert, choose the output format, and click a button to start the conversion. This process, depending on the size of the media file, is relatively fast, I can even say that it's faster than with other applications of the kind, and the results are of high quality. Besides, it is possible to convert a number of media files simultaneously with the batch conversion option. From the program's settings, you can also set other advanced features like adjusting thread options and log level.
Click HERE to get yours

msiexec.exe. What is it?
msiexec.exe. What is it?
diggMsiexec.exe is Windows® Installer.
This file is part of Windows Installer - Unicode. Msiexec.exe is developed by Microsoft Corporation. It is used to install new programs that use Windows Installer package files (MSI). It should only be running if you are running an installer. Msiexec is important for computer security and stability and should not be terminated. It’s a system and hidden file.
Msiexec.exe is usually located in the %PROGRAM_FILES% sub-folder and its usual size is 77,824 bytes.
If you are not installing anything, but msiexec is running, chances are it's a virus. Scan your computer with Malwarebytes to make sure it's not infected.
The msiexec.exe process may also be running all the time if the Windows Installer service is set to Automatic by mistake. You'll need to change the service startup type to manual. We recommend doing that using
You can also do it manually. Here's how:
1. Go to Start - Run, type in services.msc and hit Enter. A new window will open.
2. Find the Windows Installer service, right-click on it and click on Properties. A new window will open.
3. In the Startup type section, use the dropdown menu to select Manual.
4. Click Apply, then click OK
Windows XP Users: If you a getting an error saying "The Windows Installer Service Could Not Be Accessed", read this Microsoft article.
The Windows Installer Service Could Not Be Accessed"
Recommendation
Malwarebytes.org ( For Torjans, Viruses And some fake anti-virus programs)
Ccleaner.com ( does about the same as malwarebytes)
Here is a few other programs of interest Click HERE
This one is also in on of my other blogs I think, But you can get it here as well I have tested this Program and it does work. I tested it out on XP on my laptop. Since i did not have any fake viruses it didnt do nothing, So try it out if you think you have a fake Virus program It works Click HERE
--------------------------------------------------------------------------------
Do not terminate msiexec.exe if you are running an installer.
To go directly to the Online Chat room you can click HERE Enter your name and your in.
Also at the bottom of this BLOG you can leave a message or a question.
Do you or have had one of These ?
These are some of the most common Fake Virus programs out. You can click on the picture or Icon to see a bigger view of the Fake Virus.
Antivirus 7

CleanUp Antivirus

Security Central

Antivirus security

Total PC Defender 2010

Vista Antivirus Pro 2010

Your PC Protector
Vista Internet Security 2010
XP Guardian
Vista Guardian 2010
Antivirus Soft
XP Internet Security 2010
Antivirus 2010
Live PC Care
Malware Defense
Internet Security 2010
Desktop Defender 2010
Security Tool

Antivirus Live
Personal Security
Cyber Security
Alpha Antivirus
Windows Enterprise Suite
Security Center
Control Center
Braviax
Windows Police Pro
Antivirus Pro 2010
PC Antispyware 2010
FraudTool.MalwareProtector.d
Winshield2009.com
Green AV
Windows Protection Suite
Total Security 2009
Windows System Suite
Antivirus BEST
System Security
Personal Antivirus
System Security 2009
Malware Doctor
Antivirus System Pro
WinPC Defender
Anti-Virus-1
Spyware Guard 2008
System Guard 2009
Antivirus 2009
Antivirus 2010
Antivirus Pro 2009
Antivirus 360
MS Antispyware 2009
IGuardPC or I Guard PC
Additional Guard
(all of them are fake antivirus which are
viruses or trojans) from your computer.
Remove Fake Antivirus is used to remove
fake antivirus which are viruses or trojans.
Also you can use Malwarebytes here is a Picture of the real Program
Just depends on what you like
Antivirus 7

CleanUp Antivirus

Security Central

Antivirus security

Total PC Defender 2010

Vista Antivirus Pro 2010

Your PC Protector
Vista Internet Security 2010
XP Guardian
Vista Guardian 2010
Antivirus Soft
XP Internet Security 2010
Antivirus 2010
Live PC Care
Malware Defense
Internet Security 2010
Desktop Defender 2010
Security Tool

Antivirus Live
Personal Security
Cyber Security
Alpha Antivirus
Windows Enterprise Suite
Security Center
Control Center
Braviax
Windows Police Pro
Antivirus Pro 2010
PC Antispyware 2010
FraudTool.MalwareProtector.d
Winshield2009.com
Green AV
Windows Protection Suite
Total Security 2009
Windows System Suite
Antivirus BEST
System Security
Personal Antivirus
System Security 2009
Malware Doctor
Antivirus System Pro
WinPC Defender
Anti-Virus-1
Spyware Guard 2008
System Guard 2009
Antivirus 2009
Antivirus 2010
Antivirus Pro 2009
Antivirus 360
MS Antispyware 2009
IGuardPC or I Guard PC
Additional Guard
(all of them are fake antivirus which are
viruses or trojans) from your computer.
Remove Fake Antivirus is used to remove
fake antivirus which are viruses or trojans.
Also you can use Malwarebytes here is a Picture of the real Program
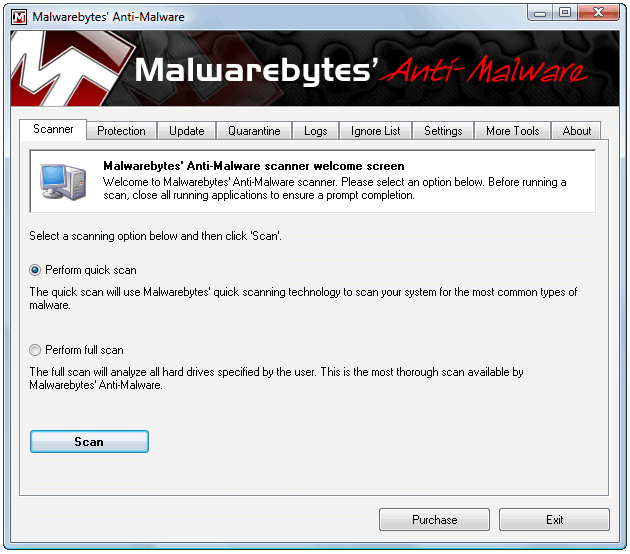
Just depends on what you like
Thursday, April 22, 2010
Don't want to Re-Install windows ? try this
Uninstall all antivirus, antispyware, firewall software.
Start
run
cmd
Click OK
del %temp% /f /a /q /s
start msconfig
Click on the Startup TAB
uncheck everything
reboot
Poof, new computer for free.
Start
run
cmd
Click OK
del %temp% /f /a /q /s
start msconfig
Click on the Startup TAB
uncheck everything
reboot
Poof, new computer for free.
Wednesday, April 21, 2010
Make your PC easier to see.
Increase the size of your icons
You can also quickly make just the icons on your desktop larger and easier to see.
Right-click the desktop, point to View, and then click Large Icons, Medium Icons, or Classic Icons. (Classic icons are the smallest size.) .
You can also use the scroll wheel on your mouse to change the size of your desktop icons.
On the desktop, press and hold CTRL while you scroll by using the wheel to change the icon size.
Use the Magnifier
You may have been using Windows for years and not realized there is a built in Magnifier that enlarges part of the screen. You can adjust the Magnifier to zoom in at various levels and focus wherever you want to focus on the screen.
Windows 7
Click Start, Type in magnifier in the search and open it. Then click the View Button, Scroll down to what View you want.Also you can HOLD down the CTRL and the Plus Sign to Zoom in and the minus sign to zoom out.
Windows Vista
Magnifier in Windows 7 includes full-screen and lens modes. Full-screen mode lets you magnify your entire screen and follow your mouse pointer. In lens mode, the area around the mouse pointer is magnified. When you move the mouse pointer, the area of the screen that is magnified moves along with it.Enlarge your mouse pointer
You can change the look of your mouse cursor so it is easier for you to quickly and easily see on-screen. Try selecting a new pointer style, and also try changing the color and size of your mouse pointer.
Windows 7
Click the Start button , click Control Panel, and then under Hardware and Sound, click Mouse.
Click the Pointers tab, and then do one of the following:
To change the look of all of your pointers, in the Scheme list, click a new mouse pointer scheme.
To change an individual pointer, in the Customize list, click the pointer you want to change, click Browse, click a pointer, and then click Open.
More ways to change your mouse settings.
Windows Vista
Click the Start button , click Control Panel, and then under Hardware and Sound, click Mouse.
Click the Pointers tab, and then do one of the following:
To change the look of all of your pointers, in the Scheme list, click a new mouse pointer scheme.
To change an individual pointer, in the Customize list, click the pointer you want to change, click Browse, click a pointer, and then click Open.
Improve your screen resolution
Screen resolution refers to the clarity of the text and images on your screen. At higher resolutions, items appear sharper, but they also appear smaller, so more items fit on the screen. At lower resolutions, fewer items fit on the screen, but they are larger and easier to see. Choose a screen resolution that is better for your eyes
To see Video on how to use these features and others, Please visit us on youtube
How to Better secure your Wireless Internet.
As a quick reference, this table shows the default addresses, usernames, and passwords for some common router manufacturers. These are the default passwords. If you have one that you do not have the password to you can reset it By pressing the Button in most cases in the back with a small Pin. Should be near the power cord.

Your wireless network name, known as the SSID. This name identifies your network. You should choose something unique that none of your neighbors will be using.
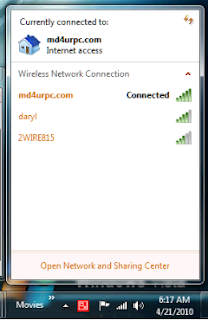
Wireless encryption (WEP) or Wi-Fi Protected Access (WPA), which help protect your wireless network. For most routers, you will provide a passphrase that your router uses to generate several keys. Make sure your passphrase is unique and long (you don't need to memorize it).
Your administrative password, which controls your wireless network. Just like any other password, it should not be a word that you can find in the dictionary, and it should be a combination of letters, numbers, and symbols. Be sure you can remember this password, because you'll need it if you ever have to change your router's settings.
The exact steps you follow to configure these settings will vary depending on the type of router you have. After each configuration setting, be sure to click Save Settings, Apply, or OK to save your changes.
Now, you should disconnect the network cable from your computer.
Note: To make setup easy, choose a network adapter made by the same vendor that made your wireless router. For example, if you find a good price on a Linksys router, choose a Linksys network adapter to go with it. To make shopping even easier, buy a bundle, such as those available from D-Link, Netgear, Linksys, Microsoft, and Buffalo. If you have a desktop computer, make sure that you have an available USB port to plug the wireless network adapter into. If you don't have any open USB ports, buy a hub to add additional ports.

To connect your laptop or desktop computer to your wireless network, follow these steps:
1.Open Connect to a Network by clicking the Start button , and then clicking Connect to.
2.In the list of networks, click the network that you want to connect to, and then click Connect.

Internet Explorer will show your router's configuration page. Most of the default settings should be fine, but you should configure three things:
Your wireless network name, known as the SSID. This name identifies your network. You should choose something unique that none of your neighbors will be using.

Your administrative password, which controls your wireless network. Just like any other password, it should not be a word that you can find in the dictionary, and it should be a combination of letters, numbers, and symbols. Be sure you can remember this password, because you'll need it if you ever have to change your router's settings.
The exact steps you follow to configure these settings will vary depending on the type of router you have. After each configuration setting, be sure to click Save Settings, Apply, or OK to save your changes.
Now, you should disconnect the network cable from your computer.
A wireless router
The router converts the signals coming across your Internet connection into a wireless broadcast, sort of like a cordless phone base station. Be sure to get a wireless router, and not a wireless access pointA wireless network adapter
Network adapters wirelessly connect your computer to your wireless router. If you have a newer computer you may already have wireless capabilities built in. If this is the case, then you will not need a wireless network adapter. If you need to purchase an adapter for a desktop computer, buy a USB wireless network adapter. If you have a laptop, buy a PC card-based network adapter. Make sure that you have one adapter for every computer on your network.Note: To make setup easy, choose a network adapter made by the same vendor that made your wireless router. For example, if you find a good price on a Linksys router, choose a Linksys network adapter to go with it. To make shopping even easier, buy a bundle, such as those available from D-Link, Netgear, Linksys, Microsoft, and Buffalo. If you have a desktop computer, make sure that you have an available USB port to plug the wireless network adapter into. If you don't have any open USB ports, buy a hub to add additional ports.

The above picture shows A laptop and a desktop connected To a wireless router, Then through the Modem.
Also the desktop is Connected with the Ethernet cord. This is how you get into the router Much faster is with the Ethernet cord, Once your wireless is set up and Secured with a password You can save all the settings and unplug the Ethernet cord from the desktop, Giving it is wireless. If not leave it pluged in.
Windows XP
Now if friends or family come over and want onto your Wireless.
1.Open Connect to a Network by clicking the Start button , and then clicking Connect to.
2.In the list of networks, click the network that you want to connect to, and then click Connect.
Windows 7
Bottom right corner on windows 7 left click the Icon for the internet and the wireless networks available show up. Find your network and click on it then enter the password when prompted.
Windows Vista
1.Open Network and Sharing Center by clicking the Start button , clicking Control Panel, clicking Network and Internet, and then clicking Network and Sharing Center.
2.In the left pane, click Set up a connection or network.
3.Click Set up a wireless router or access point, and then click Next
Subscribe to:
Comments (Atom)


